Artemia Hatching Protocol
“The universal live feed for all fish fry and invertebrates.”
Hatch brine cone
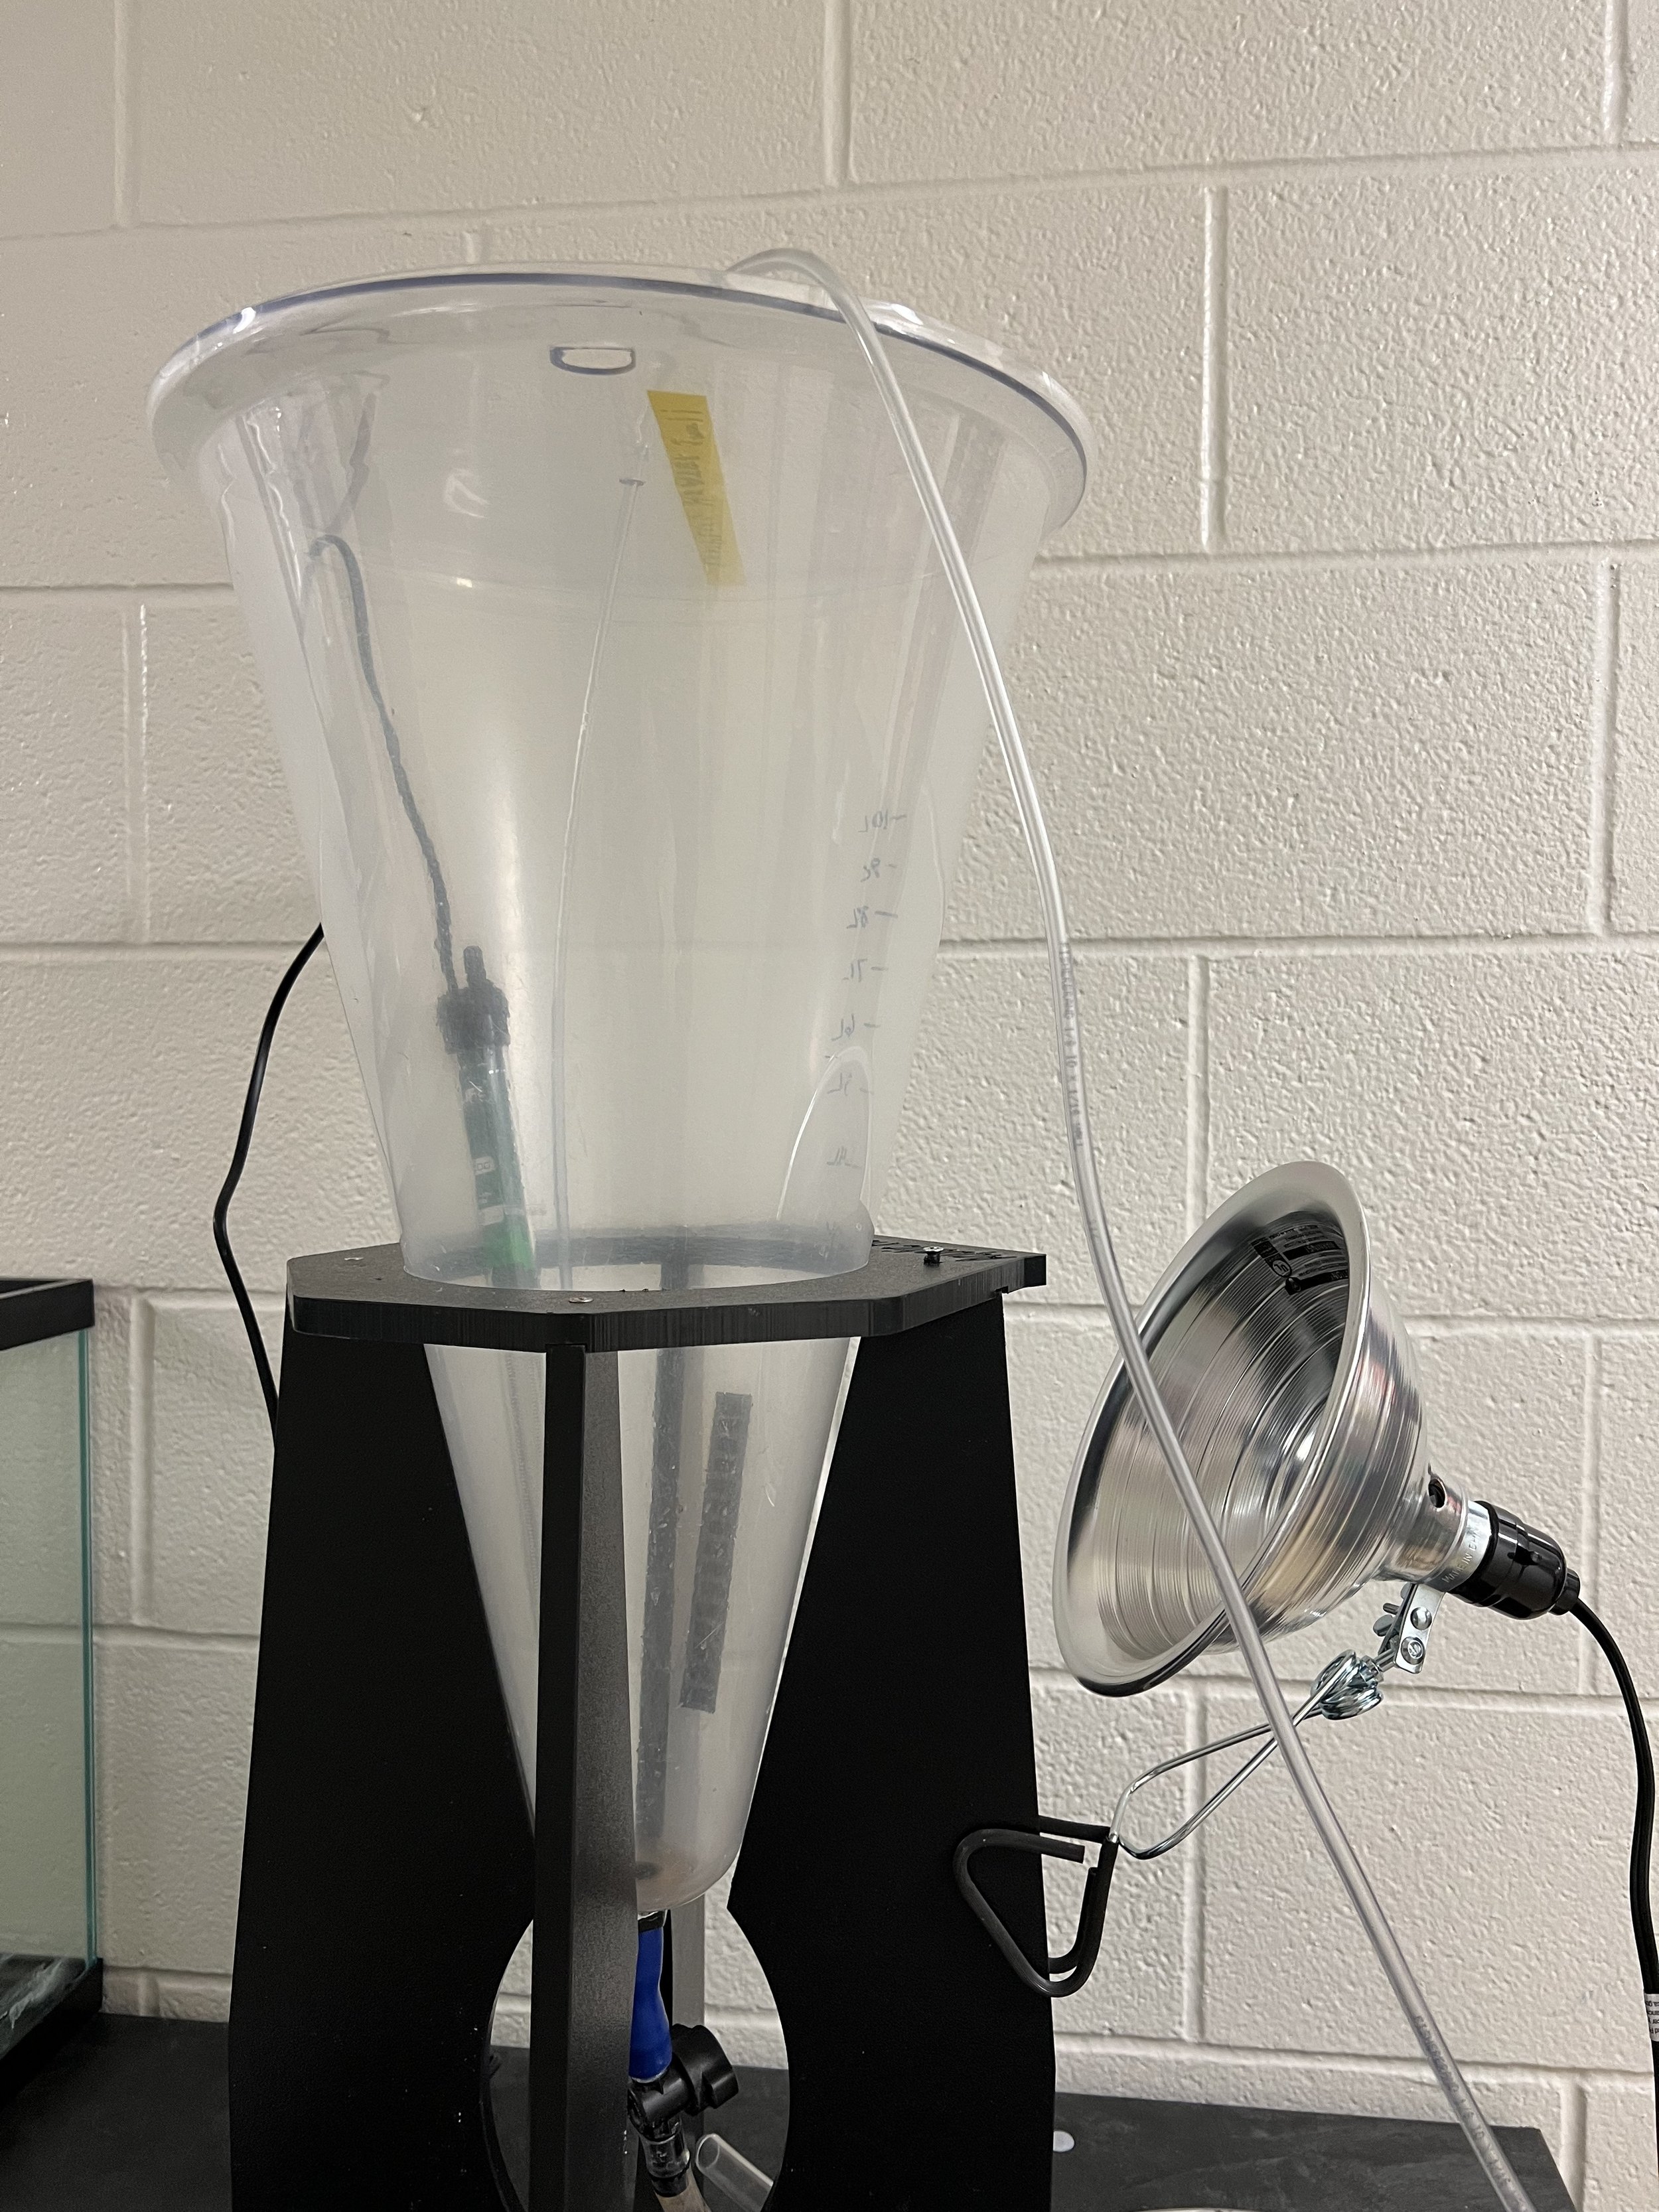
This is a hatch brine cone setup—Artemia require warm, salt water (heater), constant aeration (rigid airline to the bottom), and a 24-hour, constant light source to keep them artemia from settling (to the side of the cone or hung from above). At the bottom of the cone, there is a drain hose and valve that holds the water and artemia in the cone.
Updated March 2025 H. Valentine
Types of Brine Shrimp Eggs
Brine Shrimp eggs come in three different forms.
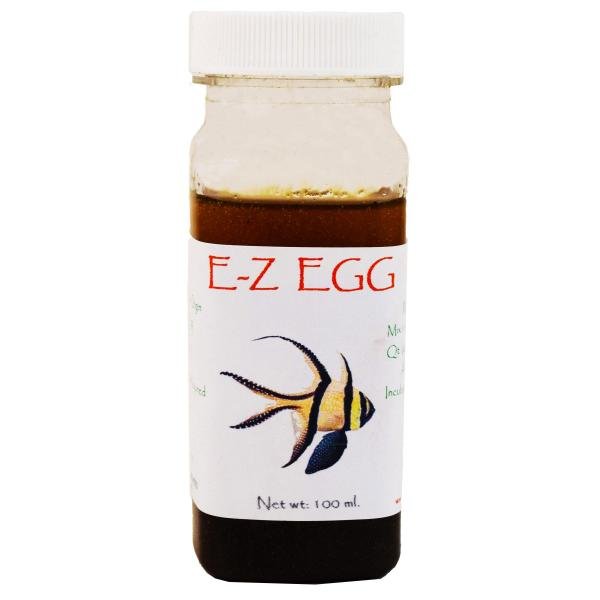
E-Z eggs—no decapsulation required
Decapsulated -NON-HATCHING eggs
Dehydrated, non-decapsulated eggs
There are many places to purchase brine shrimp eggs—Amazon, pet shops, and online suppliers. Brine Shrimp Direct carries all three types of artemia eggs shown above and various grades of brine shrimp eggs yielding 65-90% hatch-out. I discuss a different method of hatching Artemia at the bottom of this protocol if you are interested in the use of magnets to decapsulate over the thermal reaction between bleach and sodium hydroxide.
When choosing a type of brine shrimp egg for your aquarium, consider your storage methods for the eggs and the amount of brine shrimp needed to feed your animals. A one pound can of decapsulated eggs can stay in a -20˚C freezer for years. An opened can with a lid will survive a year in a -20˚C freezer. If you decapsulate the entire one pound can, the decapsulated cysts will survive in a refrigerator for two months. E-Z eggs are best within 3-4 months of opening in the refrigerator. Decapsulated, Non-Hatching Brine Shrimp Eggs remain dry; the extra drying extends the shelf life and ensures they do NOT hatch.
Decapsulation Procedure from Brine Shrimp Direct with my annotations in italics:
Ingredients
454 grams (1 pound) brine shrimp cysts
4.33 liters sodium hypochlorite (household bleach)
68.1 grams sodium hydroxide
2 liters of water
Hydration:
Dry cysts resemble deflated basketballs under the microscope. The cysts must be fully hydrated or spherical before decapsulation is to begin. Simply hydrate the cysts in a half-bucket of fresh water with aeration for one to two hours. A stir bar can be used to help suspend and move cysts during rehydration as well. Check cysts under a microscope to ensure they all look “inflated” after an hour to know if you should continue rehydrating or are ready to begin decapsulation. You can also use aeration to rehydrate cysts with an air pump, airline, and air stone.Decapsulation:
Dissolve sodium hydroxide in 2.2 liters of water and allow to cool. Do not add hypochlorite until ready to decapsulate. Collect the hydrated cysts in a 125 mesh sieve and drain. Add the sodium hypochlorite solution to the sodium hydroxide and water followed by the hydrated cysts. You can also store your solutions in a 4˚C refrigerator overnight before decapsulation to aid in keeping the temperature down below 100˚F/38˚C to ensure the color-change process described below is complete.
This step, in which the chorion is dissolved or oxidized, is exothermic (generates heat); in order to prevent the solution from exceeding a temperature that will be lethal to the embryos, ice should be added (cubed or otherwise) to maintain a reaction temperature below 100°F/38˚C. The ice is optional if your solutions were in the fridge overnight. You can also make them in the morning and ‘decap’ in the afternoon while rehydrating over lunchtime!
The cyst color should change from brown to gray to white to orange within a few minutes, depending upon the strength of the chemicals and the thickness of the shell or chorion. When the cysts are 90% orange, stop the reaction immediately by pouring the decapsulated cyst solution in a fine mesh bag and rinse well with lots of fresh water. You can also have a weak sodium thiosulfate solution on hand (or chilled overnight as well) to help ensure the decapsulation reaction is stopped before rinsing for ten or more minutes. You can also use a handheld thermometer to ensure the solutions are not exceeding 100˚F/38˚C.
To assure that the decapsulation reaction is stopped, have a solution of .1 normal hydrochloric acid (HCl) ready to stir into the cyst for one minute. Prepare this solution by adding 65 ml of hydrochloric acid (35% active) into 6.5 liters of water. A weak solution of sodium thiosulfate can also be used to neutralize the chlorine.
We use the Brine Shrimp Direct method that uses both Sodium Hypochlorite and Sodium Hydroxide solutions. There are many resources found online that solely use a Sodium Hypochlorite, bleach solution (household bleach level) as the caustic, corrosive solution like the method from Harbor Branch Oceanographic Institution and small-batch brine shrimp decapsulation directions.
Recently, I developed a protocol for decapsulating about a 1/4 portion of the full 1 pound can. I follow the above directions, but the concentrations of chemicals are adjusted as follows:
17.03 g NaOH in 55 mL of DI or Nano pure H2O
1.0 L bleach solution (the bottle of Chlorox is already a bleach solution being 6.5-12.5% sodium hypochlorite solution plus water)
113.5 g dry cysts, rehydrated in 2-3x water
3L Sodium Thiosulfate solution—15-20 g/3L
Artemia Hatching Procedure:
Set Up:
Place hatching cone or pyramid shaped vessel on a stable table or bench. Cones should be translucent for ease of harvesting and light transmission. Ensure the flow valve at the bottom of the cone is closed.
Add Water, salt, and heater:
Fill the cone with RO water and adjust salinity to 25 ppt (parts per thousand). Ensure the heater remains submerged in the water but doesn’t rest on the bottom of the cone. Optimum hatching temperature is 82°F (28°C).Add Cysts:
Add cysts at the rate of 1 gram per liter. Use a net to ensure the eggs are not clumped and able to tumble in the aeration.Aerate:
Provide adequate aeration to keep cysts in suspension. A long, rigid airline placed into the drain at the bottom of the cone helps keep the cysts in suspension.Hatch:
Depending upon water temperature, cysts should hatch in approximately 18-36 hours. Light, heat, and aeration are left on until hatching occurs.Harvest:
We use a homemade 150 microns filter to collect the artemia over a bucket.Unplug the heater before you drain any artemia from the cone. Remove the airline tube and lay it on the bench (this helps with visibility and draining). You can wipe the equipment removed from cone and rinse them in the RO water before replacing them at the final step. If you are concerned about the lamp as well, you can turn off the lamp on the side/behind while you are working with water; it will be turned on before you leave for the day for the shrimp. A straightened paperclip is useful to break up and clean the salt that builds at the end of your rigid airline over time. Check to make sure the airline is clean every time you reset your artemia cone.
Filter cup: I made my own seive by cutting a hole in the bottom of a 1 L plastic cup and attached a piece of 150 µm screen, BUT sometimes just buying a new product is just fine
Using a liter cup for collecting hatch brine allows you to collect all of the artemia from four or more liters at a time. You can purchase a premade sieve from Florida Aqua Farms, Flinn Scientific, Brine Shrimp Direct, or any other seive found online. Smaller screens seen on Brine Shrimp Direct’s website are difficult to use when liters of artemia are cultured at once. Some homemade equipment isn’t made to last like ones purchased from a company.
Rinse:
Rinse the artemia with RO water. Fill a cup half with RO water and rinse Artemia on the screen into the RO water. Artemia collected for feeding will survive in RO water for the time before feeding. You can feed with a pipette or scientific squirt bottle.
Clean Equipment:
After harvesting the Artemia, rinse, scrub, and reset the hatching cone on its stand. Ensure the valve at the bottom of the cone is closed.
Brine Shrimp Direct sells a Plankton Culturing Manual with culturing methods for Artemia as well as copepod, rotifer, and other planktonic organisms.
Other Decapsulation options:
INVE Aquaculture created a method of decapsulation that uses magnets to hatch instead of bleach or other caustic solutions. Their tools, methods, and information are seen on their website in the links below. Quoted from their website:
TECHNOLOGY
Cysts coated with a layer of non-toxic, magnetic material can be separated from the Artemia nauplii in a easy and simple way after hatching, freeing the Artemia nauplii in an efficient way from the indigestible cysts and shells
BENEFITS
Simple harvest
Non-toxic waste
More and high-quality nauplii
Faster harvest and nauplii collection


